The qgis2leaf Plugin
About qgis2leaf
Using Leaflet to make interactive web maps is very straight forward, but what if you don’t have any experience writing html or JavaScript? Well, you are in luck! There is a qgis2leaf plugin for QGIS from Geolicious. The qgis2leaf plugin can instantly turn your styled QGIS layers into a leaflet map that is ready to post to your website. The plugin creates the html page with the necessary CSS stylesheets and JavaScript files in just a few clicks. That’s it all done (well, almost)!
The current version of qgis2leaf (v.1.4.2), as of the time of this article, contains the options to include multiple QGIS layers, which you choose, and multiple base maps, which you also choose, into a single leaflet map. There are options to control the size of the map frame, including full screen, and set the initial view (center point and zoom level). The qgis2leaf plugin is really great at generating Leaflet maps, but occasionally, you may still want to tweak the final map or a layer manually to have just the right appearance.
Using qgis2leaf
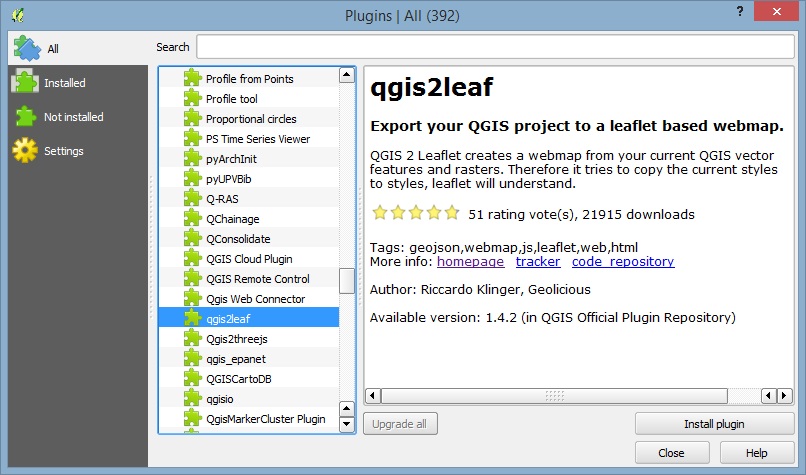
Let’s take a look at using the qgis2leaf plugin. First, install the qgis2leaf plugin if you have not already. From QGIS click the
Plugins > Manage and Install Plugins menu item. Once the Plugins dialog appears, find and select the qgis2leaf plugin.
Then click the install button. Close the Plugins dialog and return to QGIS. The qgis2leaf plugin will add an icon to the Plugins toolbar.
If you do not see the Plugins toolbar in QGIS, right click on an active toolbar and select the "Plugins" item in the popup menu. You can dock the Plugins toolbar wherever you like.
In the map below is same layer used in the Population Estimates Leaflet map, just styled differently in QGIS. Note that the layer is washed-out because the it's
transparency has been set to 50% so you will be able to see the base map through the features in the final map. Click the qgis2leaf icon on the Plugins toolbar and complete
the dialog to make the Leaflet map.

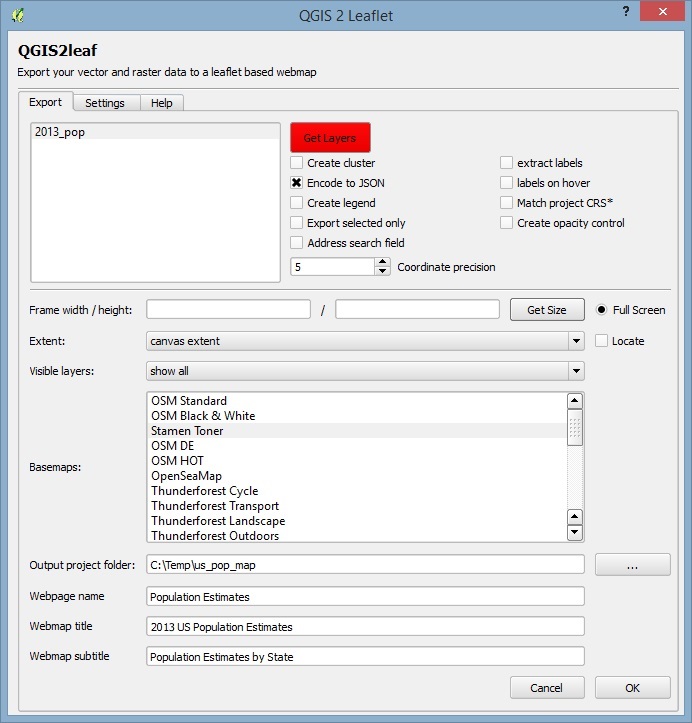
The qgis2leaf options used to create the Leaflet map in this example are shown in the dialog below. There is a help tab in the dialog if you need more information about a specific option.
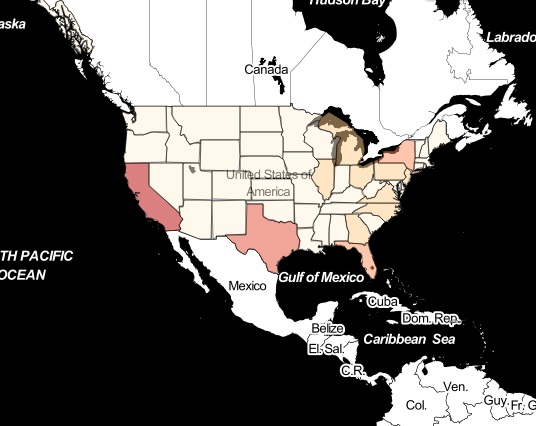
The final map made with the qgis2leaf plugin can be found on the Example Leaflet Maps page or in full screen mode by clicking on the image below.
If you need to add additional attributions to the map, open the generated index.html and insert the attribution within the last script tag. Here’s and example:
map.attributionControl.addAttribution('Source Some Website')
Thanks Geolicious!